The Ultimate NES Mod
aka:
A fully Emulated Nintendo Entertainment System!
Tutorial written
by: Mr. Chips
Tutorial written by: Mr. Chips
This
Page
Onto Page 2
Onto Page 3
Best viewed at 1280x1024
The
Theory

CAUTION:
***Modding
and working with electricity, electronics, hot irons, and dremel tools can be
dangerous if you don't know how to use them. Please make sure that you know how
to. Proceed at your own risk!!!
**Don't try
to use the stock NES power switch without the proper DC specified capacitor in
place. It is there for a reason. Failure to do so may result in sparks/overloading
breaker/and possible damage to your Dreamcast or yourself.
*Have
fun, take your time.
Tools:

Pliers, any will do
Hot
glue (or electrical tape, as used in tutorial)
Phillips
Screwdriver
Small Phillips Screwdriver
Soldering
Iron (20 to 25W)
Flux (optional)
Solder
Dremel
Tool w/discs and eye protection
X-acto Knife (or hobby knife)
A Brain
Time
Needed
Parts:
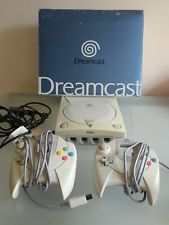
A Dreamcast (preferably one that reads CD-Rs
or this mod is pointless!)
1 (or 2) Regular Dreamcast controller(s)
(Smaller ones prefered)
1 (or 2) Nintendo Controller(s)
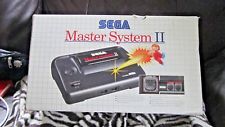
An
old-school Nintendo system (A/V and power wires not needed)
1
(or 2) Joystick Extension Cable(s)
Why
Would Anyone Do This?
In case you are ignorant, or just a flamer...it's
the same reason people put computers loaded with MAME into arcade cabinets. It's
about the experience of owning a "real" NES, Playing it exactly the way it was
intended to be played, with a NES Console and NES controllers. Having the option
of never having to insert game cartridges is good too. And there is no having
to clean it or worry about blowing out the dust. You can store all your backups
on a single CD selfbooted with NesterDC, the Nintendo emulator for Sega DreamCast.
Getting Started:
Start by taking
out the guts of the NES. Keep the case, the switch assembly, and the controller
cover. Keep 8 screws, plus the 2 silver 'controller cover' screws. Toss the rest,
or nail it to the wall... your choice!
Take the nes case to an
area where you can make a mess.
Put on protective eyewear. Start
dremeling out the inner screwmounts. LEAVE the ones shown. You want to close this
case up eventually.

Shown to
the right is part of the Joystick extension cable. We'll get into that later.
Focus on making room at this point.

Notice how I have dremeled these two main screwmounts?
The top left has been chiseled down (still intact though!), while the top center
one has been removed. It's ok to remove this one, so we can fit in the DC's parts.
You will not know exactly how much to remove, until you get the DC parts lined
up. So that will be next!
The Hottest DCEmu Posters
|